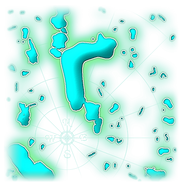
Mission 2 of Battle at Procyon's campaign involves Admiral Amelia assigning the newly promoted, Lieutenant Hawkins, his first mission as an officer in the Royal Navy. Hawkins mission is to find out why Pirates operating in the area have been able to avoid capture and arrest them. For a full list of dialogue, see here.
Characters[]
- Lieutenant Hawkins
- Mr. Onyx
- Admiral Amelia
- Greech
- Owen Ried
- Captain Grange
- Dr. Delbert Doppler
Details[]
***SPOILERS AHEAD FOR TREASURE PLANET: BATTLE AT PROCYON***
Briefing[]
Amelia: 'Greetings Lieutenant. We have a bit of a mystery on our hands. It appears there are some pirates operating in the area, but they always seem to evade capture. Your job is to find out why, and to put an end to it. They may be operating a small base on one of the local islands due South of here, so keep an eye out. If you discover any suspicious settlements, you are expected to capture them and take prisoners.'
Hawkins: 'Yes, Ma'am!'
Searching the settlements[]
Mission 2's first objective is to search for settlements that the smugglers may be operating from. The first suspicious settlement is located directly south of where the player starts, when the player reaches the settlement Mr. Onyx will spot a camp on the island, the player will then be required to dock on the island to investigate.
The second settlement that must be searched is located directly south of the first. Unlike the first camp, this one is inhabited. The second camp will start firing at the player when approached, however it's poorly defended, only armed with two Light LaserBall Cannons atop wooden structures. After the camp's defences are destroyed the player will be required to dock. Hawkins will then interrogate the smuggler, Greech, who will tell him that the pirate, Grange, is located north east of the camp's location.
The search for Grange[]
The next objective is to search north-west for Captain Grange. Shortly after leaving the camp, the player will encounter the first meteor shower in the campaign. After evading the meteor shower, Mr. Onyx will spot a message rocket. After the message rocket is retrieved, it will explain that the Schooner, SS Coventry, is under attack north of the message rocket's location.
When the player reaches the SS Coventry, the Captain, Owen Ried, will explain that the Pirates immobilised them and prepared to board them, but the left for seemingly no reason, before Hawkins' Torpedo Boat, RLS Comet, was within visual range. Hawkins suspects that the Pirates must have some way of spotting them beyond visual range. Ried will then request that Hawkins tow the SS Coventry south to Norville, along the way are a small group of asteroids. When the player arrives at Norville, they must dock.
When the SS Coventry is towed to Norville, Owen Ried will tell Hawkins that another Schooner, called the SS Lady J, might be under attack by the Pirates, Hawkins agrees to search for the Pirates in that area.
The Lady J[]
The next objective is the search for the Schooner, SS Lady J, which is located north of Norville. Along the way, another message rocket will be encountered. When the message rocket is retrieved, a pod of Whales will appear. Mr. Onyx suggest that they stay near the pod, as it might interfere with the Pirate's sighting equipment.
The next objective marker will mark the location of the SS Lady J and Grange's Schooner, Ravage. The player does not have to follow Mr. Onyx's advice and stay with the whales, however if the player does then the Ravage will not spot the player, even if they go right next to them. The Ravage will spot the player if they are not near the whales, or if the player fires at them.
The fight against Ravage is similar to the fight against Warrior in Mission 1, as the only difference is that Ravage isn't towing anything. Any tactics that worked in the fight against Warrior will also work here. After sinking Ravage, the player must pick up the lifeboats for the mission to end.
Epilogue[]
Hawkins: 'We were lucky today. Onyx and I boarded the pirate vessel just as Captain Grange was about to throw his 'secret weapon' overboard, to be lost in the Etherium, forever. As near as I can tell, it's some sort of map scanner. With it, the pirate was able to see us coming long before we could see him. I was able to contact my old mentor, Dr. Doppler, and he believes the map scanner was built by the same ancient culture that built the technology on Treasure Planet. With his help, I figured out how to link this device to any standard naval navigation station. The pirates have run circles around us for long enough. Now it's our turn! With those strange iron vessels attacking the frontier, we need every advantage we can get! Now, if only I can get the Admiralty to assign us to the frontier, we can get in on the fight!'
Ships[]
Hawkins[]
Torpedo Boats[]
| RLS Comet |
Imperial[]
Command Escorts[]
| RLS Lyonesse |
Civilian[]
Fishing Vessels[]
| Fishing Vessels | |
| Fishing Vessels |
Schooners[]
| SS Coventry | |
| SS Lady J |
Packet Ships[]
| SS Abbot | |
| SS Harrow |
Barques[]
| SS Denman |
Pirate[]
Schooners[]
| Ravage |
Geography[]
Mission 2's map has a massive amount of islands within it, more than any other map in the game. Near the centre of the map is the Dog's Leg Island, the largest island within the map, at the south-east corner is Norville, at the north-west is the first smuggler base, with the second one located directly south of it. The player starts at the north-west corner of the map, and throughout the mission will travel in a rough V shape around the Dog's Leg Island.
Gallery[]
|
||||||||||||


